Lighting Ideas
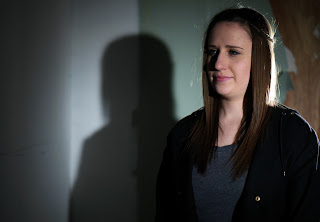
Our idea for the lighting was too keep it low key as it is a recognisable trait of film noir. We wanted the model to be well lit as we was taking a fashion photograph so the clothes had to be shown. Here are some lighting ideas we liked:
We liked the venetian blind effect that is often used in film noir's.
The idea of having lights in our street scene that look like street lamps appealed to us as it would make the scene look more realistic.
This image appealed to us because of the way the models are lit up and how the scene is lit but isn't distracting from the models
We liked the idea of having street lamps in the back of the image.
We liked the way the smoke was lit on this image.
Lighting Workshops
During a lighting workshop we experimented with film noir style lighting. As we liked the venetian blind lighting which is commonly used in film noirs we decided to experiment with that first. We achieved it by holding objects in front of the light to block of some of the light to achieve the venetian blind lighting.
We also experimented with creating a street light effect with the lighting. To achieve this effect we placed a light high in the air and then pointed it down to the model.
Next we experimented with using blue gells in front of the lights to create a very dramatic feel. This effect would be ideal if we were to shoot in colour.
When we done a studio mock up we also experimented with lighting. We placed a light in the background to make it look as if it was a street light. During this set build we felt the light would be too close to the camera and would look to bright so if we was to do this idea we would have to make our street longer.
The week before the set build we made another mock set build so we could see how the lighting would look. For the image below we had one HMI Light on a large stand at the back of the set build to act as a lamp post, we also had one small light directed through onto the alley wall to act as a car light, we then had another two small lights to light up the male models legs. To light up the female model we had a Kingflo with the cage of and the barn doors directed so the model was only lit up.
After we had painted the walls we shone a light on to them to see how they looked when they were lit up, we felt that they looked realistic especially when they were more darker as it casts stronger shadows.
Final Lighting
On the thursday of our set build we used the day to get all of the lighting perfect. We started of with the same lighting we used on our lighting workshop the week before and added to it to improve it. We changed how the model was going to be lit up as we wanted something brighter, we decided to have a 650W Arri light which was positioned above the model and pointed down so her face was lit up. To act as a street lamp we used the same HMI light as before but this time we placed a glass filter on it to diffuse the lighting slightly, we positioned this light high in the air and pointed down so it looks like a street lamp. To light up the male models legs and to act as the car headlight we used the same lights as before. As the image was so dark you couldn't notice the drain pipe in the image so to make it stand out we placed two 350W Arri lights in the alley way to light up the pipe from behind. We also had a 650W Arri light pointed directly at the bin as it looked very flat in the picture and because we wanted more shadows. After taking some images we realised that you couldn't see the detail in the models fur coat as it was too black so we added another 350W light to point at the coat from the front. Only one side of the model was being back lit so we added an extra 350W Arri light so it was pointed at the models back to add detail to the coat.
This is a diagram of the lighting we used for our final image (the white backdrops indicate where a wall was):
This is how our lighting looked:


No comments:
Post a Comment